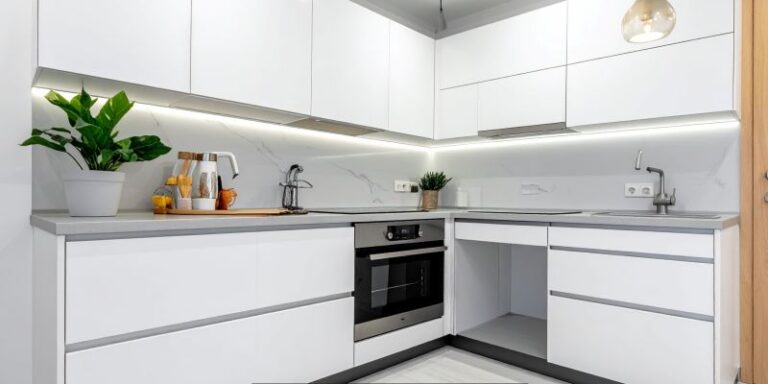
Are your kitchen cabinets looking tired, outdated, or worn out? Instead of spending thousands of dollars on a full kitchen remodel, consider refreshing them with a fresh coat of paint. Painting your kitchen cabinets is a cost-effective and DIY-friendly way to breathe new life into your kitchen. In this guide, we’ll walk you through the process of how to refresh your kitchen cabinets with paint, while also sharing tips to ensure a professional-looking finish.
Why Paint Your Kitchen Cabinets?
Painting your kitchen cabinets is one of the most impactful ways to update your kitchen without breaking the bank. Here are a few benefits:
- Cost-Effective: Painting cabinets is significantly cheaper than replacing them.
- Customizable: Choose any color to match your kitchen’s aesthetic.
- Quick Transformation: A fresh coat of paint can make your kitchen look brand new in just a few days.
- Eco-Friendly: Repurposing your existing cabinets reduces waste.
Step-by-Step Guide to Painting Kitchen Cabinets
1. Gather Your Supplies
Before you start, make sure you have the right tools and materials:
- Screwdriver
- Sandpaper (120-grit and 220-grit)
- Degreaser or TSP (Trisodium Phosphate)
- Primer (oil-based or shellac-based for best adhesion)
- Paint (semi-gloss or satin finish is ideal for cabinets)
- Paintbrushes and foam rollers
- Painter’s tape
- Drop cloths
- Cabinet hardware (optional, if you want to replace knobs and pulls)
2. Remove Cabinet Doors and Hardware
Start by removing the cabinet doors, drawers, and hardware. Label each door and drawer with painter’s tape to make reassembly easier. Remove hinges, knobs, and pulls, and set them aside.
3. Clean the Cabinets
Grease, grime, and dirt can prevent paint from adhering properly. Use a degreaser or TSP to thoroughly clean all surfaces. Pay special attention to areas around the stove and sink, as these tend to accumulate the most grease.
4. Sand the Surfaces
Lightly sand the cabinet doors, frames, and drawers using 120-grit sandpaper. This step helps the primer adhere better. After sanding, wipe away dust with a damp cloth or tack cloth. For a smoother finish, follow up with 220-grit sandpaper.
5. Apply Primer
Priming is essential for a long-lasting finish. Use a high-quality primer designed for cabinets. Apply a thin, even coat using a brush or roller, and let it dry completely. Sand lightly with 220-grit sandpaper after the primer dries to ensure a smooth surface.
6. Paint the Cabinets
Choose a durable paint formulated for cabinets, such as acrylic latex or enamel paint. Apply the first coat using a brush for edges and corners and a foam roller for flat surfaces. Let the first coat dry completely, then lightly sand and wipe away dust. Apply a second coat for a flawless finish.
7. Reassemble and Add New Hardware
Once the paint is fully dry, reattach the cabinet doors and drawers. If desired, replace old hardware with new knobs and pulls for an extra touch of style.
Tips for a Professional Finish
- Choose the Right Color: Neutral tones like white, gray, or beige are timeless, while bold colors like navy blue or emerald green can make a statement.
- Work in a Well-Ventilated Area: Ensure proper ventilation to avoid inhaling fumes.
- Take Your Time: Rushing the process can lead to drips and uneven coverage.
- Use High-Quality Tools: Invest in good brushes and rollers for a smoother application.
Best Paint Colors for Kitchen Cabinets
- Classic White: Brightens the space and creates a clean, timeless look.
- Soft Gray: Adds a modern, sophisticated touch.
- Navy Blue: Brings depth and elegance to your kitchen.
- Sage Green: Offers a calming, nature-inspired vibe.
- Black: Creates a bold, dramatic statement.
Frequently Asked Questions
Q: How long does it take to paint kitchen cabinets?
A: The process typically takes 3-5 days, including drying time between coats.
Q: Do I need to sand cabinets before painting?
A: Yes, sanding ensures better adhesion and a smoother finish.
Q: Can I paint over laminate cabinets?
A: Yes, but you’ll need a primer designed for laminate surfaces.
Q: How long does painted cabinets last?
A: With proper preparation and high-quality paint, painted cabinets can last 5-10 years or more.
Conclusion
Refreshing your kitchen cabinets with paint is an affordable and rewarding DIY project that can completely transform your kitchen. By following these steps and tips, you can achieve a professional-looking finish that will make your space feel brand new. Whether you opt for a classic white or a bold color, painted cabinets are a great way to update your kitchen’s style without the hassle of a full renovation.
Ready to get started? Gather your supplies, pick your favorite color, and give your kitchen cabinets the makeover they deserve!