Ice fishing is a thrilling winter activity that combines patience, skill, and the right equipment. One of the most innovative tools that has revolutionized ice fishing is the underwater camera. These devices allow anglers to see beneath the ice, providing real-time visuals of fish behavior, underwater structures, and bait movement. If you’re looking to enhance your ice fishing game, this guide will walk you through how to use underwater cameras for ice fishing effectively.
Why Use an Underwater Camera for Ice Fishing?
Before diving into the “how,” let’s explore the “why.” Underwater cameras offer several advantages for ice fishing enthusiasts:
- Real-Time Fish Tracking: See where fish are swimming and how they react to your bait.
- Improved Accuracy: Identify the depth and location of fish, allowing you to adjust your strategy.
- Explore Underwater Structures: Locate drop-offs, weed beds, and other fish-holding areas.
- Learn Fish Behavior: Observe how fish interact with your lures and bait, helping you refine your techniques.
- Increased Success Rates: By seeing what’s happening below the ice, you can make informed decisions that lead to more catches.
Choosing the Right Underwater Camera for Ice Fishing
Not all underwater cameras are created equal. When selecting a camera for ice fishing, consider the following features:
- Cold Weather Durability: Ensure the camera is designed to withstand freezing temperatures.
- High-Resolution Imaging: Look for cameras with clear, high-definition video quality to see fish and structures clearly.
- Night Vision or Low-Light Capability: Ice fishing often occurs in low-light conditions, so this feature is crucial.
- Portable and Easy to Use: Opt for a lightweight, user-friendly camera that’s easy to transport and set up.
- Long Battery Life: Cold weather can drain batteries quickly, so choose a camera with a reliable battery.
Popular brands like Aqua-Vu, Marcum, and Cabela’s offer excellent options tailored for ice fishing.
How to Use an Underwater Camera for Ice Fishing: Step-by-Step Guide
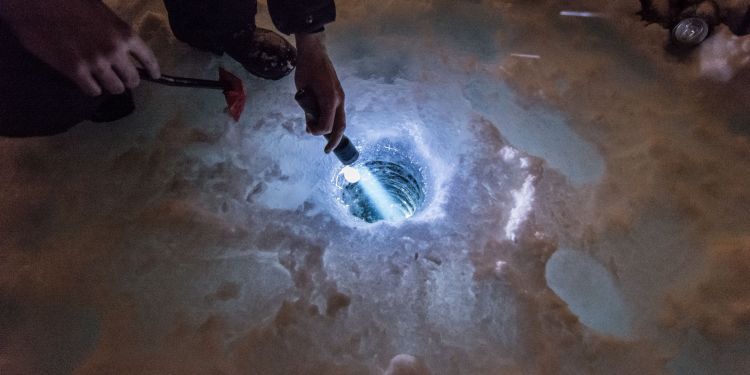
1. Drill Your Ice Hole
- Start by drilling a hole in the ice using an auger. Make sure the hole is wide enough to accommodate the camera.
- Clear any ice shavings or debris from the hole to ensure a clear view.
2. Set Up the Camera
- Attach the camera to its lowering cable or pole. Most underwater cameras come with a built-in cable for easy deployment.
- Adjust the camera angle to ensure it captures the desired area. Some cameras allow you to rotate the lens remotely.
3. Lower the Camera into the Water
- Gently lower the camera into the hole until it reaches the desired depth. Use the cable markings to gauge how deep the camera is.
- Position the camera so it faces your fishing line or the area you want to monitor.
4. Connect to a Monitor or Smartphone
- Most underwater cameras come with a portable monitor or can connect to your smartphone via Wi-Fi or Bluetooth.
- Adjust the brightness, contrast, and other settings to optimize the view.
5. Observe and Adjust
- Watch the monitor to see fish activity, underwater structures, and how your bait is performing.
- If you’re not seeing fish, adjust the camera’s position or move to a new location.
6. Use the Camera to Improve Your Fishing Strategy
- If fish are ignoring your bait, try switching lures or adjusting your presentation.
- Use the camera to identify the depth at which fish are most active and set your bait accordingly.
Tips for Maximizing Your Underwater Camera’s Effectiveness
- Keep the Lens Clean: Ice and debris can obstruct the camera’s view. Use a soft cloth to clean the lens regularly.
- Use a Camera with Infrared or LED Lights: These features improve visibility in murky or dark water.
- Avoid Spooking Fish: Lower the camera slowly and keep it at a distance from your bait to avoid scaring fish away.
- Combine with a Fish Finder: Pair your underwater camera with a fish finder for a more comprehensive understanding of the underwater environment.
- Practice Patience: It may take time to get used to using an underwater camera, but the insights it provides are worth the effort.
Common Mistakes to Avoid
- Placing the Camera Too Close to the Bait: This can scare fish away. Keep the camera at a reasonable distance.
- Ignoring Battery Life: Always carry spare batteries or a power bank to avoid running out of power.
- Not Adjusting the Camera Angle: A poorly positioned camera won’t provide useful footage. Take the time to set it up correctly.
- Using the Camera in Murky Water: While some cameras have low-light capabilities, extremely murky water can limit visibility.
Conclusion
Using an underwater camera for ice fishing can transform your winter angling experience. By providing real-time visuals of the underwater world, these devices help you make smarter decisions and increase your chances of success. Whether you’re a seasoned ice angler or a beginner, investing in a high-quality underwater camera is a game-changer.
Remember to choose a camera that suits your needs, set it up correctly, and use the insights it provides to refine your fishing strategy. With practice, you’ll be able to master the art of ice fishing with an underwater camera and enjoy a more productive and exciting season on the ice.