A pergola is a fantastic addition to any outdoor space, offering both style and functionality. Whether you want to create a shaded retreat, enhance your garden’s aesthetics, or add value to your home, building a pergola is a rewarding project. In this guide, we’ll walk you through the step-by-step process of constructing a pergola, from planning to installation.
Why Build a Pergola?
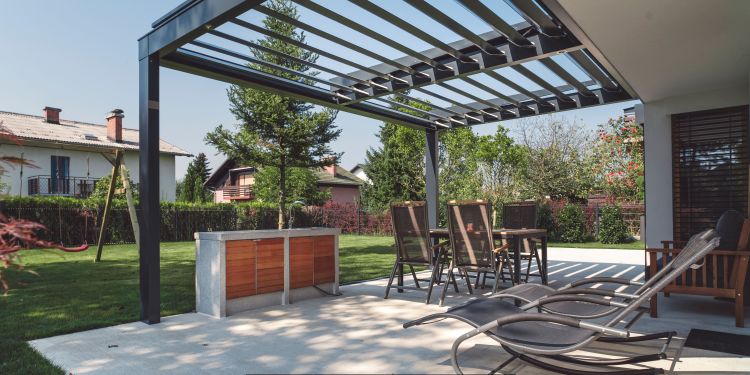
Before diving into the construction, let’s explore the benefits of having a pergola in your backyard:
- Enhances Outdoor Living – A pergola creates a defined space for relaxing, dining, or entertaining.
- Provides Shade – While not fully enclosed, a pergola offers partial shade and can support climbing plants or retractable canopies for additional cover.
- Boosts Property Value – A well-designed pergola increases curb appeal and can make your home more attractive to buyers.
- Supports Greenery – Climbing plants like wisteria, ivy, or roses can be trained to grow on a pergola, adding natural beauty.
Step 1: Plan Your Pergola Design
Before picking up tools, take time to plan:
- Choose a Location – Pick a spot with enough space, considering sunlight, wind direction, and proximity to your house.
- Determine the Size – Standard pergolas are 8×8 feet or larger. Choose dimensions that fit your space and needs.
- Select Materials – Common options include:
- Wood (cedar, redwood, or pressure-treated pine) – Classic and durable.
- Metal (aluminum or steel) – Sleek and modern.
- Vinyl – Low maintenance and weather-resistant.
- Check Permits & Regulations – Some local codes may require permits, so check with your municipality before starting construction.
Step 2: Gather Tools and Materials
You’ll need the following:
Materials:
✔ Pressure-treated wood or metal beams
✔ Concrete mix
✔ Post brackets
✔ Screws, bolts, and washers
✔ Stain or sealant (for wood)
Tools:
🛠 Power drill
🛠 Circular saw
🛠 Level
🛠 Tape measure
🛠 Post hole digger
Step 3: Build the Pergola
1. Mark and Dig Post Holes
- Mark the location of your posts using stakes and string for accuracy.
- Dig holes at least 2 feet deep for stability.
2. Install the Posts
- Place posts into the holes and fill them with concrete.
- Use a level to ensure they’re straight. Let the concrete cure for 24-48 hours.
3. Attach the Beams and Rafters
- Secure horizontal support beams across the posts using bolts.
- Attach rafters across the top at equal distances for a uniform look.
4. Add Decorative Elements (Optional)
- Install lattice panels or hanging planters for extra style.
- Consider adding retractable fabric covers for more shade.
Step 4: Finish and Maintain Your Pergola
- Seal or Stain – If using wood, apply a weatherproof stain or sealant to protect against the elements.
- Regular Maintenance – Clean debris, check for loose bolts, and repaint or reseal annually.
Final Thoughts
Building a pergola is a great way to elevate your outdoor space while creating a stylish and functional retreat. With the right materials and planning, you can customize a pergola to fit your personal style and enjoy your backyard to the fullest.