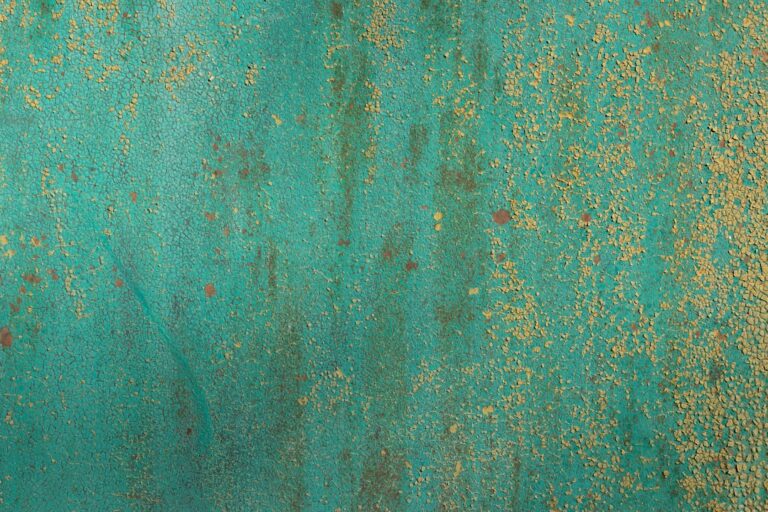
Peeling paint is a common issue that many homeowners encounter, and understanding its causes is essential for effective remediation. One of the primary reasons for paint peeling is moisture intrusion. When water seeps into the walls, whether from leaks, high humidity, or condensation, it can cause the paint to lose its adhesion to the surface.
This is particularly prevalent in areas like bathrooms and kitchens, where moisture levels are typically higher. Additionally, if the surface was not adequately prepared before painting, such as failing to clean or prime it properly, the paint may not adhere well, leading to peeling over time. Another significant factor contributing to peeling paint is temperature fluctuations.
Extreme changes in temperature can cause the materials of a building to expand and contract, which can stress the paint film. This is especially true for exterior surfaces that are exposed to harsh weather conditions. Furthermore, using low-quality paint or applying paint over a dirty or greasy surface can also lead to adhesion problems.
Understanding these causes allows homeowners to take preventive measures and address issues before they escalate into more significant problems.
Key Takeaways
- Peeling paint can be caused by moisture, poor adhesion, or old age, so it’s important to identify the root cause before repainting.
- Properly preparing the surface by cleaning, sanding, and priming is crucial for a successful paint repair job.
- Choosing the right type of paint for the specific surface and conditions is essential for long-lasting results.
- Scraping and sanding the peeling areas thoroughly is necessary to create a smooth and even surface for repainting.
- Filling in gaps and cracks with a suitable filler material is important to ensure a seamless finish after repainting.
Preparing the Surface for Repainting
Cleaning the Surface
The first step in surface preparation involves thoroughly cleaning the area to remove any dirt, grease, or old paint flakes. A clean surface is essential for ensuring that the new paint adheres properly. Neglecting this step can lead to premature peeling and chipping of the new paint.
Inspecting and Repairing the Surface
Once the surface is clean, it is essential to inspect it for any damage that may need repair. This includes checking for cracks, holes, or other imperfections that could affect the final appearance of the paint job. Addressing these issues before painting not only enhances the aesthetic appeal but also contributes to the longevity of the paint.
A Smoother Application and a More Durable Finish
By taking the time to prepare the surface properly, homeowners can ensure a smoother application process and a more durable finish. Proper surface preparation is crucial for achieving a long-lasting finish, and it is an essential step that should not be overlooked.
Choosing the Right Paint for Repairs
Selecting the appropriate paint for repairs is a critical step in ensuring a successful repainting project. Different types of paint are formulated for various surfaces and conditions, so understanding these distinctions is vital. For instance, exterior paints are designed to withstand harsh weather conditions and UV exposure, while interior paints focus more on aesthetics and ease of cleaning. Homeowners should consider factors such as durability, finish type, and color when making their selection. In addition to choosing the right type of paint, it is also important to consider the quality of the product.
Higher-quality paints often contain better pigments and binders, which can enhance adhesion and durability. While they may come at a higher price point, investing in quality paint can save homeowners money in the long run by reducing the frequency of repainting. By carefully selecting the right paint for their specific needs, homeowners can achieve a more professional-looking finish that stands the test of time.
Scraping and Sanding the Peeling Areas
| Area | Scraping Time (hours) | Sanding Time (hours) |
|---|---|---|
| Living Room | 3 | 2 |
| Kitchen | 2 | 1.5 |
| Bedroom | 1.5 | 1 |
Once the surface has been prepared and the right paint has been chosen, the next step involves scraping and sanding any peeling areas. This process is essential for removing loose or flaking paint that could interfere with the adhesion of new paint. Using a putty knife or scraper, homeowners can carefully lift away any damaged sections without causing further harm to the underlying surface.
After scraping, sanding is necessary to create a smooth surface for painting. Sanding helps to feather the edges of the remaining paint, ensuring a seamless transition between old and new layers. It also provides a rough texture that enhances adhesion for the new paint.
Homeowners should use fine-grit sandpaper for this task to avoid damaging the surface beneath. By taking these steps, they can ensure that their repainting efforts will yield a smooth and professional-looking finish.
Filling in Gaps and Cracks
Filling in gaps and cracks is an essential part of preparing a surface for repainting. These imperfections not only detract from the overall appearance but can also lead to further damage if left unaddressed. Homeowners should use a high-quality filler or caulk specifically designed for their surface type—whether it be wood, drywall, or masonry—to ensure a proper seal.
Once applied, it is crucial to allow the filler to dry completely before proceeding with sanding or painting. After drying, homeowners should sand down any excess filler to create a smooth surface that blends seamlessly with the surrounding area. This attention to detail will help achieve a polished look once the new paint is applied.
By taking the time to fill in gaps and cracks effectively, homeowners can significantly enhance both the appearance and durability of their painted surfaces.
Applying Primer to the Repaired Areas
Why Primer is Essential for Repaired Surfaces
For surfaces that have been patched or filled, primer is especially important as it ensures that these areas do not absorb paint differently than surrounding surfaces.
Selecting the Right Primer for Your Project
When selecting a primer, homeowners should choose one that is compatible with their chosen paint type—whether oil-based or water-based—to ensure optimal results. The application process should be done carefully; using a brush or roller designed for primer can help achieve an even coat.
The Importance of Proper Application and Drying Time
After applying primer, it is essential to allow adequate drying time before moving on to painting. This step lays a solid foundation for the final coat and contributes significantly to the overall quality of the finished project.
Painting Over the Repaired Areas
Once primer has been applied and dried, homeowners can proceed with painting over the repaired areas. This stage marks an exciting transition in the project as it brings color and life back into previously peeling surfaces. It is advisable to start with a brush for edges and corners before using a roller for larger areas; this technique ensures that every nook and cranny receives adequate coverage.
When applying paint, homeowners should aim for thin coats rather than thick layers. Thin coats dry more evenly and reduce the risk of drips or runs, which can mar an otherwise flawless finish. Depending on the color and type of paint used, multiple coats may be necessary for full coverage.
It’s important to allow each coat to dry completely before applying subsequent layers; this patience will pay off in achieving a vibrant and durable finish.
Using Proper Techniques for a Smooth Finish
Achieving a smooth finish requires attention to detail and proper techniques during application. Homeowners should use high-quality brushes or rollers designed specifically for their chosen paint type; this choice can make a significant difference in how well the paint applies and adheres. When using a roller, it’s beneficial to use long strokes in one direction rather than back-and-forth motions; this technique helps minimize texture and creates an even coat.
Additionally, homeowners should be mindful of their environment while painting. Dust particles in the air can settle on wet paint and create an uneven texture once dried. To combat this issue, it’s advisable to work in a clean area with minimal foot traffic during application.
By employing these techniques, homeowners can achieve a professional-looking finish that enhances their space’s overall aesthetic appeal.
Allowing Sufficient Drying Time
Allowing sufficient drying time between coats is crucial for achieving optimal results in any painting project. Each layer of paint needs adequate time to cure properly; rushing this process can lead to issues such as smudging or uneven finishes. Homeowners should refer to the manufacturer’s instructions regarding drying times as these can vary based on factors like humidity and temperature.
In addition to waiting between coats, it’s also important to allow ample time for the final coat to dry before reintroducing furniture or decor into the space. This precaution helps prevent accidental damage or marks on freshly painted surfaces. By being patient and allowing sufficient drying time throughout the process, homeowners can ensure that their hard work results in a beautiful and lasting finish.
Maintaining the Repaired Areas
Once the painting project is complete, maintaining repaired areas becomes essential for preserving their appearance over time. Regular cleaning is key; homeowners should use gentle cleaning solutions that won’t damage the paint while removing dirt or grime buildup. It’s advisable to avoid abrasive cleaners or scrubbing pads that could scratch or wear down painted surfaces.
Additionally, homeowners should periodically inspect repaired areas for signs of wear or damage. Catching issues early allows for timely repairs before they escalate into larger problems requiring extensive work. By incorporating regular maintenance into their routine, homeowners can extend the life of their painted surfaces and keep them looking fresh and vibrant.
Seeking Professional Help if Necessary
While many homeowners may feel confident tackling repainting projects on their own, there are instances where seeking professional help may be warranted. If peeling paint is extensive or if underlying issues such as mold or structural damage are suspected, consulting with professionals can provide valuable insights and solutions that go beyond simple cosmetic fixes. Professional painters bring expertise and experience that can save time and ensure high-quality results.
They are equipped with specialized tools and techniques that may not be readily available to DIY enthusiasts. For those who feel overwhelmed by large projects or lack experience in surface preparation and painting techniques, hiring professionals can alleviate stress while delivering exceptional outcomes that enhance their home’s value and appeal. In conclusion, addressing peeling paint requires a comprehensive approach that encompasses understanding its causes, preparing surfaces properly, selecting appropriate materials, and employing effective techniques throughout each stage of repainting.
By following these guidelines diligently—whether undertaking DIY efforts or enlisting professional assistance—homeowners can restore their spaces beautifully while ensuring lasting results that stand up against time and wear.
FAQs
What causes wall paint to peel?
The most common causes of peeling wall paint are moisture, poor surface preparation, using low-quality paint, or applying paint in extreme temperatures.
How can I fix peeling wall paint?
To fix peeling wall paint, you will need to scrape off the loose paint, sand the area, apply a primer, and then repaint the surface with a high-quality paint.
Can I prevent wall paint from peeling in the future?
Yes, you can prevent wall paint from peeling in the future by ensuring the surface is properly prepared before painting, using high-quality paint, and addressing any moisture issues in the area.
Is it necessary to use a primer when fixing peeling wall paint?
Yes, using a primer is necessary when fixing peeling wall paint as it helps the new paint adhere to the surface and provides a uniform base for the topcoat.
When should I consider hiring a professional to fix peeling wall paint?
If the peeling is extensive, or if you are unsure of the underlying cause, it may be best to hire a professional to assess and fix the peeling wall paint.