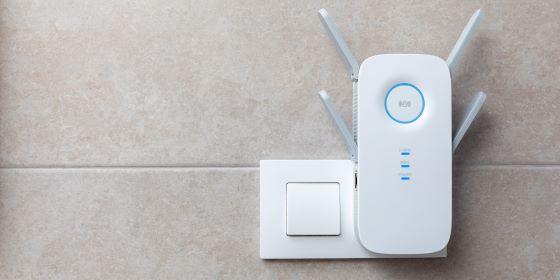
Is your extender not working? It might be because there could be some setup issues. You do not need to worry as we are here with some setup tips which will help you get this Wavlink extender at your place.
Manual Setup Of The Wavlink Extender Follow This Setup Guide
This one is the manual method for setting up the Wavlink extender. Follow the Wavlink setup steps.
- Attach any WiFi device through the wavlink extender make sure the device you are using is wifi enabled. Like a laptop, smartphone, computer, etc.
- After this, when light starts to become visible on the extender it means it is in connection.
- Now, wait and search for the settings on your device.
- In addition, select the wireless WiFi settings on your device.
- You may find the Wavlink Extender network when you open the networks list on your device.
- Go on a web browser like Mozilla Firefox after that open the Address bar.
- Therefore, enter the extender’s web address and a new page for the wifi.wavlink.com login will open up on the display.
- Log in to the extender by inserting the accurate username and password by default.
- Finally, install or connect the Wavlink extender, just after following the setup instructions on the device’s screen.
Wavlink Extender Setup Through WPS Method
We call it the Wireless Protected method or push button both. Considering the purpose, you can follow these instructions for the setup without accessing the wifi.wavlink.com login page.
- First, move your extender near the proximity of the router.
- Then, after connecting it, turn the extender on.
- Wait for the light to turn on green.
- Then, hold on to the WPS button on the extender.
- At the same time press the WPS switch on the router and extender.
- Let your home networks synchronize and wait with the router. If, a green light is visible after connection.
- Once you will get onto the extender setup page by logging the installation it means the process is complete after doing some basic things.
How to Update Wavlink Firmware?
- To start with, establish a cable connection between your Wavlink extender and the PC.
- Take an Ethernet wire. Just ensure that it might not be a damaged Ethernet cable.
- In addition, make sure while establishing the connection that it should be a finger-tight Ethernet connection.
Open a Web Browser
After making sure that you are done establishing a connection between the updated devices, take one laptop or a computer. As this will be the device you would be establishing a connection with. So make sure it is virus free.
You nod your head yes if we will be asking if your computer or laptop is ready for use now. Great! So, load your favorite internet browser. First, you need to update, and second, it should be from cache, cookies, and browsing history. Then, just download the latest firmware file after completing the wifi.wavlink.com login process and perform the process later.
Resolve Errors From Extender
Switch on the WLAN extender to perform the reset process if you face an error in its working.
- Just hold the button for about thirty seconds.
- Keep the extender off holding the button at the same time.
- Still, keep holding the button for quite thirty seconds.
- Continue holding the ability and button on the extender.
- Again hold it for an additional thirty seconds.
- The extender can intercommunicate its default settings when the completion of this reset operation.
- Currently, you’ll be able to simply access the extender’s default setting method. Send your system for repair if you continue to can’t resolve the problem.
Reconfiguring The Extender
- In the new beginning for configuration, connect your main existing router with the Wavlink WLAN extender.
- Then, attach your device to the extender’s wireless network.
- Therefore enter the respective address in the address bar of your browser.
- Press enter to proceed and reach the login and setup pages.
- Once the login process is complete, you will visit the setup page soon.
- Adhere to the on-screen directions to complete the setup process.
- While setting up the extender just ensure to verify the IP address and other things of the extender.
Place The Devices Closer
- Do not forget to emit them as they can cause a problem with your WiFi signals. Distance is a big issue of all time, never forget that. First, you need to verify the router’s placement. So there can be no dead zones left. As these dead zones can actually break the signals chain and also disturb transmission.
- As said above the Wavlink router and the extender are at a nearby place. Although this one was the easiest tip; if you think you are unable to fix the problem you can probably take the other step. Which is a hard reset.
We hope the tips given here justify your queries regarding the wifi.wavlink.com login and setup processes.