Home repair projects are an essential aspect of maintaining a comfortable and functional living environment. They encompass a wide range of tasks, from minor fixes to more significant renovations, and can often be tackled by homeowners themselves.
For many, the satisfaction derived from completing a home repair task is unparalleled, as it fosters a sense of accomplishment and self-sufficiency. Moreover, home repair projects can be a cost-effective alternative to hiring professionals. With the right knowledge and tools, homeowners can address common issues that arise in their living spaces.
As they embark on these projects, they often discover new skills and gain confidence in their abilities, making them more adept at handling future repairs.
Key Takeaways
- Home repair projects can save you money and improve the functionality and appearance of your home.
- Basic tools and materials such as a screwdriver, pliers, wrench, and safety goggles are essential for home repair projects.
- Fixing a leaky faucet involves turning off the water supply, disassembling the faucet, replacing the washer or O-ring, and reassembling the faucet.
- Patching a hole in drywall requires cutting a patch, applying joint compound, and sanding the area for a smooth finish.
- Unclogging a drain can be done using a plunger, drain snake, or a mixture of baking soda and vinegar followed by hot water.
Tools and Materials Needed for Home Repair Projects
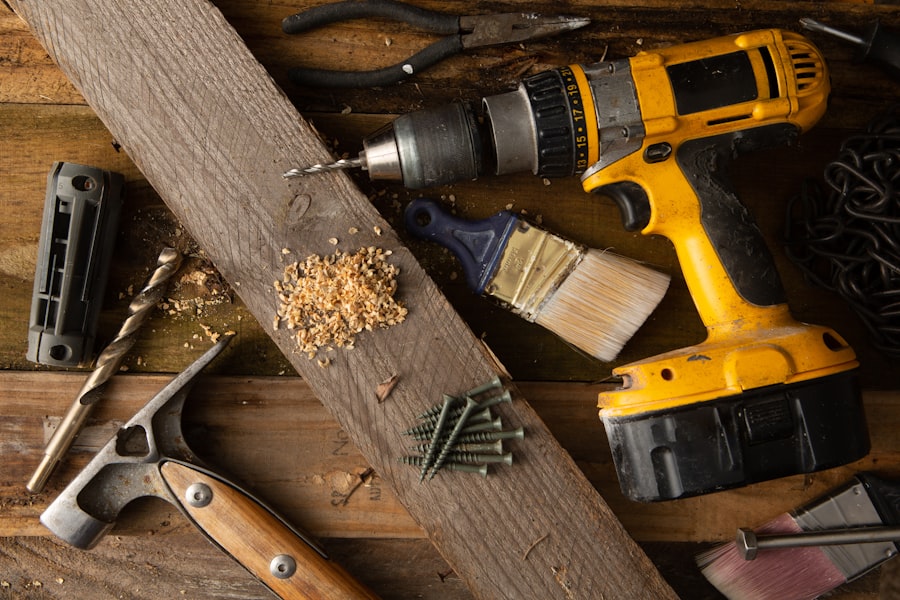
Before diving into any home repair project, it is crucial to gather the necessary tools and materials. A well-equipped toolbox can make all the difference in the efficiency and success of a repair task. Basic tools such as a hammer, screwdriver set, pliers, and a tape measure are fundamental for most projects.
Additionally, having a level, utility knife, and a set of wrenches can prove invaluable for more specialized tasks. In terms of materials, the requirements will vary depending on the specific project at hand. For instance, repairing drywall may necessitate joint compound, drywall tape, and sandpaper, while fixing plumbing issues might require plumber’s tape and replacement washers.
It is advisable for homeowners to familiarize themselves with the materials needed for common repairs and to keep a stock of essential items on hand. This preparation not only streamlines the repair process but also minimizes delays caused by last-minute trips to the hardware store.
Fixing a Leaky Faucet

A leaky faucet is one of the most common household nuisances that can lead to wasted water and increased utility bills. Addressing this issue promptly is essential for both environmental and financial reasons. The first step in fixing a leaky faucet involves identifying the type of faucet in question—whether it is a compression, cartridge, ball, or ceramic disk faucet—as each type has its unique components and repair methods.
Once the faucet type is determined, the homeowner can proceed with disassembling it carefully. This typically involves turning off the water supply, removing the handle, and accessing the internal components. Common culprits for leaks include worn-out washers or O-rings that need replacement.
After replacing these parts, reassembling the faucet is crucial to ensure that everything fits snugly and securely. A successful repair not only eliminates the annoying drip but also restores peace of mind regarding water conservation.
Patching a Hole in Drywall
Patching holes in drywall is another common home repair task that can significantly improve the appearance of walls. Holes can occur for various reasons, such as accidental impacts or the removal of fixtures. Regardless of the cause, addressing these imperfections is vital for maintaining a polished look in any room.
The process begins with assessing the size of the hole; small holes can often be patched with spackle or joint compound, while larger holes may require a more involved approach. For larger holes, homeowners should cut a piece of drywall to fit the opening and secure it in place with screws or adhesive. Once the patch is in place, applying joint compound over the seams and feathering it out onto the surrounding wall is essential for a seamless finish.
After allowing the compound to dry, sanding it smooth will prepare the surface for painting. A fresh coat of paint will complete the repair, making the patched area virtually indistinguishable from the rest of the wall.
Unclogging a Drain
Clogged drains are an all-too-frequent issue in households, often leading to frustration and inconvenience. Homeowners may encounter slow-draining sinks or completely blocked toilets that disrupt daily routines. Fortunately, unclogging a drain can often be accomplished without professional assistance by employing some straightforward techniques.
The first step is to identify the source of the clog; common culprits include hair, soap scum, food particles, or foreign objects. One effective method for clearing minor clogs involves using a plunger. By creating suction and pressure within the drain, plungers can dislodge blockages effectively.
For more stubborn clogs, homeowners may opt for a drain snake or auger to reach deeper into the plumbing system. In cases where these methods fail, pouring a mixture of baking soda and vinegar down the drain can help break down organic material and clear minor blockages. Regular maintenance and preventive measures can also help reduce the likelihood of future clogs.
Replacing a Light Fixture

Replacing a light fixture can dramatically alter the ambiance of a room while also improving energy efficiency with modern options. Homeowners may choose to upgrade their lighting for aesthetic reasons or simply to replace outdated fixtures that no longer function properly. The process begins with ensuring safety by turning off power at the circuit breaker before removing the old fixture.
Once power is off, detaching the existing light fixture involves unscrewing it from its mounting bracket and disconnecting the wiring. Homeowners should take care to note how the wires are connected for easy reinstallation of the new fixture. After securing the new fixture in place and connecting the wiring according to color codes—typically black to black (or red), white to white, and grounding wires together—the fixture can be mounted securely.
Finally, restoring power allows homeowners to enjoy their newly installed lighting.
Repairing a Squeaky Door
Squeaky doors are often an annoyance that can disrupt peace within a home. The sound typically arises from friction between door hinges or misalignment within the door frame. Fortunately, repairing a squeaky door is usually a straightforward task that requires minimal tools and materials.
The first step involves identifying which hinge is causing the noise; this can often be done by gently opening and closing the door while listening closely. Once identified, applying lubricant such as WD-40 or silicone spray directly onto the hinge will usually resolve the issue. Homeowners should open and close the door several times after application to ensure that the lubricant penetrates effectively.
In cases where misalignment is causing squeaking or difficulty in opening and closing, adjusting hinge screws or shimming hinges may be necessary to realign the door properly.
Maintaining and Repairing Grout in Tile Joints
Grout maintenance is an often-overlooked aspect of home repair that plays a significant role in preserving tile surfaces’ integrity and appearance. Over time, grout can become discolored or cracked due to wear and tear or exposure to moisture. Regular cleaning with appropriate solutions can help maintain grout’s appearance; however, when damage occurs, repairs may be necessary to prevent further deterioration.
Repairing grout typically involves removing damaged sections using a grout saw or similar tool before applying fresh grout into the joints. Homeowners should ensure that they choose grout that matches existing colors for a seamless look. After applying new grout, sealing it once it has cured will help protect against moisture infiltration and staining in the future.
By prioritizing grout maintenance and repair, homeowners can extend the life of their tile surfaces while enhancing their overall aesthetic appeal. In conclusion, home repair projects encompass various tasks that contribute significantly to maintaining a comfortable living environment. With proper tools and knowledge, homeowners can tackle common issues such as leaky faucets, drywall patches, clogged drains, light fixture replacements, squeaky doors, and grout repairs with confidence.
Engaging in these projects not only enhances one’s living space but also fosters a sense of accomplishment and self-reliance that comes from successfully managing home maintenance tasks independently.
FAQs
What is the article about?
The article is a comprehensive guide on how to tackle 20 common home repair projects that homeowners may encounter.
What are some of the home repair projects covered in the article?
The article covers a wide range of home repair projects including fixing a leaky faucet, repairing a hole in the wall, unclogging a drain, replacing a light fixture, and more.
Are the instructions in the article easy to follow?
Yes, the article provides step-by-step instructions for each home repair project, making it easy for readers to follow along and complete the tasks.
Do I need special tools or equipment for these home repair projects?
Most of the projects can be completed with basic tools that are commonly found in a household toolbox. However, some projects may require specific tools or materials, which are clearly outlined in the article.
Are there safety tips included in the article?
Yes, the article includes important safety tips for each home repair project to ensure that readers can complete the tasks safely and without injury.
Can beginners with no prior experience in home repair complete these projects?
Yes, the article is designed to be beginner-friendly and provides detailed instructions that are easy to follow, making it suitable for individuals with no prior experience in home repair.


