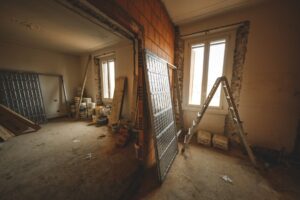
Creaky floorboards are a common nuisance in many homes, often causing frustration for residents and guests alike. The origins of these annoying sounds can be traced back to several factors, primarily related to the materials and construction methods used in flooring. One of the most prevalent causes is the natural settling of a house over time.
As a building ages, the foundation may shift slightly, leading to gaps between the floorboards and the underlying joists. This movement can create friction, resulting in the characteristic creaking sound when someone walks across the floor. Another significant contributor to creaky floorboards is the type of flooring material used.
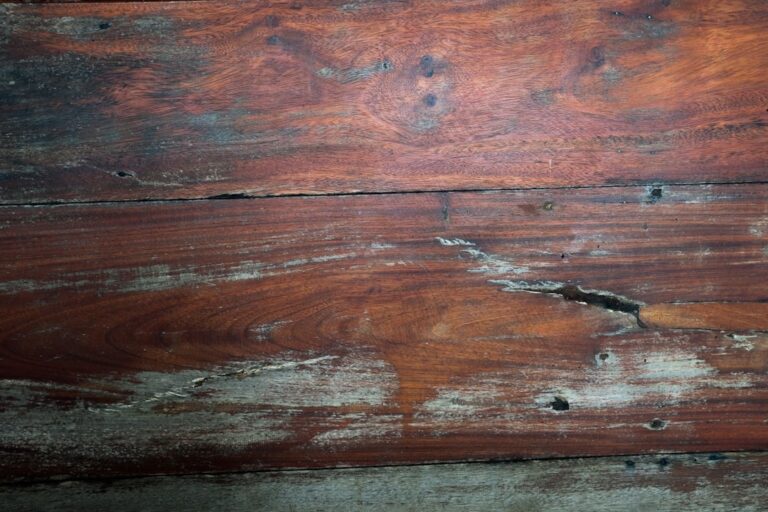
Solid wood floors, while aesthetically pleasing and durable, are particularly prone to squeaking due to their natural expansion and contraction with changes in humidity and temperature. Additionally, improper installation techniques, such as insufficient nailing or inadequate spacing between boards, can exacerbate the problem. Understanding these causes is crucial for homeowners seeking to address the issue effectively and restore peace to their living spaces.
Key Takeaways
- Creaky floorboards can be caused by a variety of factors, including loose nails, wood shrinkage, and friction between boards.
- Problem areas in your floor can be identified by walking around and listening for creaks, as well as inspecting for loose boards and damaged areas.
- Tools and materials needed for repairing squeaky floorboards include a hammer, nails, screws, drill, wood shims, lubricant, adhesive, and floor joist reinforcement brackets.
- Methods for fixing creaky floorboards include securing loose boards with screws, applying lubricants to reduce friction, and repairing damaged areas to prevent future creaking.
- Using shims and screws can stabilize loose floorboards and eliminate squeaks by providing additional support and reducing movement between boards.
Identifying the problem areas in your floor
High-Traffic Areas and Visual Inspections
Often, creaks will be more noticeable in high-traffic areas, such as hallways or near doorways, where the floorboards experience more wear and tear. Visual inspections can also reveal problem areas, and homeowners should look for signs of wear, such as gaps between floorboards or visible movement when pressure is applied.
Conducting a Thorough Inspection
Using a flashlight can help illuminate darker corners and highlight any irregularities in the flooring. Furthermore, checking the joists beneath the floor can provide insight into whether structural issues may be contributing to the creaking.
Creating a Comprehensive Plan
By thoroughly assessing both sound and sight, homeowners can create a comprehensive plan for addressing their creaky floorboards. This plan will enable them to focus their repair efforts more effectively and ensure a successful outcome.
Tools and materials needed for repairing squeaky floorboards
Once problem areas have been identified, homeowners will need to gather the appropriate tools and materials for repairing squeaky floorboards. A basic toolkit should include a hammer, a drill, screws, wood shims, and a level. These items will enable individuals to stabilize loose boards and secure them more effectively to the underlying joists.
Additionally, a measuring tape will be essential for ensuring accurate placements and adjustments during repairs. In terms of materials, homeowners may also want to consider lubricants such as paraffin wax or silicone spray, which can help reduce friction between floorboards and eliminate squeaks without requiring extensive repairs. If any boards are damaged or warped, replacement boards may be necessary.
It is advisable to choose materials that match the existing flooring in terms of color and texture for a seamless repair. By assembling these tools and materials beforehand, homeowners can streamline the repair process and tackle their creaky floorboards with confidence.
Methods for fixing creaky floorboards
| Method | Effectiveness | Difficulty |
|---|---|---|
| Using shims | High | Medium |
| Applying lubricant | Low | Low |
| Tightening screws | Medium | Low |
| Replacing damaged boards | High | High |
There are several methods available for fixing creaky floorboards, each suited to different situations and levels of severity. One common approach involves tightening loose boards by driving screws through them into the joists below. This method is particularly effective for boards that have become detached over time due to settling or wear.
By securing the boards more firmly, homeowners can significantly reduce or eliminate creaking sounds. Another method involves using shims to fill gaps between the floorboards and joists. Shims are thin wedges of wood that can be inserted into spaces where movement occurs.
By carefully placing shims in strategic locations, homeowners can stabilize loose boards and minimize friction that leads to squeaking. This technique is often used in conjunction with screws for a more comprehensive solution. Ultimately, the choice of method will depend on the specific circumstances of each home and the severity of the creaking issue.
Using shims and screws to stabilize loose floorboards
One of the most effective ways to address creaky floorboards is by using shims and screws to stabilize loose boards. This method begins with identifying areas where movement occurs, typically by walking on the floor and listening for creaks. Once these areas are pinpointed, homeowners can carefully lift the affected boards to access the joists beneath.
After lifting the boards, shims can be inserted into any gaps between the joists and the underside of the floorboards. These shims should be placed strategically to ensure even support across the board’s length. Once shims are in place, screws can be driven through the boards into the joists below, securing them firmly in position.
This combination of shimming and screwing not only reduces movement but also helps prevent future creaking by providing a stable foundation for the flooring.
Applying lubricants to reduce friction and eliminate squeaks
Choosing the Right Lubricant
Common lubricants include paraffin wax, which can be rubbed directly onto the seams between boards, or silicone spray, which can be applied in a more targeted manner.
Applying Lubricants Effectively
To apply lubricants effectively, homeowners should first clean the area around the squeaky boards to remove any dust or debris that could interfere with adhesion. Once cleaned, they can apply their chosen lubricant generously along seams or joints where friction occurs. After application, it is advisable to walk on the area to work the lubricant into any gaps and ensure even distribution.
Immediate Relief from Squeaks
This simple yet effective technique can provide immediate relief from annoying squeaks without requiring extensive repairs.
Repairing damaged floorboards to prevent future creaking
In some cases, creaky floorboards may be a symptom of underlying damage that needs addressing before any repairs can be made. Homeowners should inspect their flooring for signs of warping, cracking, or other forms of deterioration that could contribute to noise issues. If damaged boards are identified, they will need to be replaced or repaired to prevent future creaking.
Replacing damaged floorboards typically involves removing the affected board carefully without causing further damage to surrounding areas. Once removed, a new board that matches in size and finish should be installed in its place. Homeowners may need to sand down edges or apply stain or finish to ensure a seamless appearance with existing flooring.
By addressing damaged boards proactively, homeowners can not only eliminate current squeaks but also prevent future issues from arising.
Using adhesive to secure loose floorboards and eliminate squeaks
Another effective method for addressing creaky floorboards involves using adhesive to secure loose boards firmly in place. This approach is particularly useful for areas where screws may not be feasible due to limited access or where additional support is needed alongside mechanical fasteners. Adhesive can help bond boards together more securely while also filling any gaps that may contribute to noise.
To use adhesive effectively, homeowners should first clean the area thoroughly before applying it between loose boards or along seams where movement occurs. Once applied, it is essential to press down firmly on the boards to ensure proper adhesion and allow sufficient time for drying according to manufacturer instructions. This method not only helps eliminate squeaks but also reinforces overall stability within the flooring system.
Reinforcing floor joists to prevent creaking in the future
For homes experiencing persistent creaking issues despite various repair attempts, reinforcing floor joists may be necessary as a long-term solution. Floor joists provide critical support for flooring systems; if they are weak or compromised due to age or damage, they can contribute significantly to noise problems. Reinforcing these joists involves adding additional support beams or blocking between existing joists.
Homeowners should begin by assessing their current joist structure for signs of sagging or damage before proceeding with reinforcement measures. Once identified, additional blocking can be installed perpendicular between existing joists at regular intervals to provide extra support and stability throughout the flooring system. This reinforcement not only helps reduce creaking but also enhances overall structural integrity within the home.
Tips for maintaining a creak-free floor
Maintaining a creak-free floor requires ongoing attention and care from homeowners. Regular inspections of flooring systems can help identify potential issues before they escalate into significant problems requiring extensive repairs. Homeowners should pay particular attention during seasonal changes when humidity levels fluctuate significantly; this is often when wood floors expand or contract most noticeably.
Additionally, keeping humidity levels consistent within living spaces through proper ventilation or dehumidification can help minimize movement within wooden floors over time. Regular cleaning routines that include sweeping or vacuuming debris from between boards will also prevent buildup that could contribute to friction-related noise issues down the line. By implementing these maintenance practices consistently over time, homeowners can enjoy quieter living spaces while prolonging their flooring’s lifespan.
When to call in a professional for help with creaky floorboards
While many homeowners may feel comfortable tackling minor repairs themselves, there are instances when calling in a professional becomes necessary for addressing creaky floorboards effectively. If extensive damage is present or if structural issues are suspected within joists or subflooring systems, seeking expert assistance is advisable to ensure safety and proper resolution. Additionally, if previous repair attempts have failed or if noise persists despite efforts made at home, professionals possess specialized knowledge and tools that can provide more comprehensive solutions tailored specifically for each situation encountered within individual homes.
Ultimately, knowing when to seek help from experienced contractors ensures that homeowners receive quality service while safeguarding their investment in both property value and comfort within their living spaces.
FAQs
What causes creaky floorboards?
Creaky floorboards are typically caused by the wood drying out and shrinking, or by the floorboards becoming loose over time. This can create gaps between the boards, leading to the creaking sound when weight is applied.
How can I repair creaky floorboards?
There are several methods for repairing creaky floorboards, including using shims to fill gaps, applying lubricant to reduce friction between boards, or securing loose boards with screws or nails.
When should I consider professional help for creaky floorboard repair?
If the creaky floorboards are part of a larger structural issue, or if the repair requires specialized tools or expertise, it may be best to seek professional help. Additionally, if the creaking is due to water damage or rot, a professional should be consulted.
Are there any preventative measures to avoid creaky floorboards?
To prevent creaky floorboards, it’s important to maintain a consistent level of humidity in the home to prevent the wood from drying out and shrinking. Additionally, regularly inspecting and maintaining the floorboards can help prevent issues from developing.